

How to install a 2 Way Pull Cord Switch in a wooden wall?
Leave a message

Installing a 2 Way Pull Cord Switch in a wooden wall can seem like a daunting task, but with the right guidance and a bit of know - how, it can be accomplished smoothly. As a supplier of 2 Way Pull Cord Switches, I'm here to share a step - by - step guide to help you through the process.
Tools and Materials You'll Need
Before you start the installation, gather the necessary tools and materials. You will need a 2 Way Pull Cord Switch, a screwdriver (both flat - head and Phillips), a voltage tester, wire strippers, electrical tape, a drill with appropriate drill bits, and a pencil. Additionally, make sure you have the right type of electrical wires for the switch.
Safety First
Safety is of utmost importance when dealing with electrical installations. Always turn off the power supply at the main breaker panel before you start working on the switch. Use a voltage tester to double - check that there is no electricity flowing through the wires. Wear insulated gloves and safety glasses to protect yourself from any potential electrical shocks or debris.
Step 1: Plan the Installation
Decide where you want to install the 2 Way Pull Cord Switches. In a typical 2 - way switching setup, one switch is usually placed at the entrance of a room, and the other at the opposite end. Mark the positions on the wooden wall using a pencil. Ensure that the locations are easily accessible and do not interfere with any furniture or other objects.
Step 2: Prepare the Wall
If you are installing the switch in a new wall or a wall that has not been pre - drilled, use a drill to create holes for the switch boxes. The size of the holes should match the dimensions of the switch boxes. Be careful not to drill too deeply and damage any wiring or pipes behind the wall. Once the holes are drilled, insert the switch boxes into the holes and secure them to the wall using screws.
Step 3: Run the Wires
The next step is to run the electrical wires between the two switch locations. You will need three - core and earth cable for a 2 - way switching system. Start by pulling the cable through the switch boxes at both locations. Make sure there is enough slack in the cable to allow for easy connection to the switches.
Step 4: Connect the Wires to the Switches
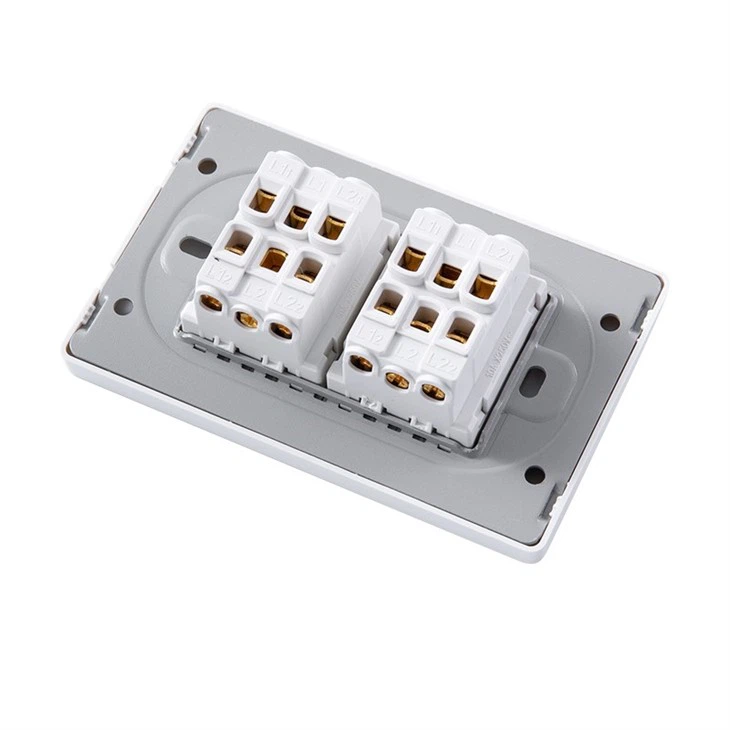
Now it's time to connect the wires to the 2 Way Pull Cord Switches. First, strip about half an inch of insulation from the ends of the wires using wire strippers. Identify the live, neutral, and earth wires. The live wire is usually brown, the neutral wire is blue, and the earth wire is green and yellow.
On the switch, there are usually three terminals: common (C), line 1 (L1), and line 2 (L2). Connect the live wire to the common terminal of the first switch. Then, connect the other two wires (from the three - core cable) to the L1 and L2 terminals of the first switch. Repeat the same process for the second switch, but this time, connect the live wire from the light fixture to the common terminal of the second switch.
Step 5: Mount the Switches
Once the wires are connected, carefully mount the 2 Way Pull Cord Switches into the switch boxes. Use the screws provided with the switches to secure them in place. Make sure the switches are level and flush with the wall surface.

Step 6: Test the Installation
After mounting the switches, turn the power back on at the main breaker panel. Test the switches by pulling the cords. If the light turns on and off from both switches, the installation is successful. If not, turn off the power again and double - check the wire connections.
Additional Tips and Related Products
When it comes to electrical switches, there are various options available. For example, if you are looking for more advanced functionality, you might consider a 2 Gang Switch With 1 Dimmer. This type of switch allows you to control two lights or electrical devices, with one of them having the option to adjust the brightness.
Another option is the Two Way Changeover Switch. This switch is useful in situations where you need to switch between two different power sources or circuits.
If you have a more complex lighting setup, such as a three - way or four - way switching system, the Two Way Intermediate Switch can be a great addition. It allows you to control a light from multiple locations.
Conclusion
Installing a 2 Way Pull Cord Switch in a wooden wall is a project that can be completed by most DIY enthusiasts with a basic understanding of electrical work. By following the steps outlined above and taking the necessary safety precautions, you can have a functional 2 - way switching system in no time.
As a supplier of high - quality 2 Way Pull Cord Switches, we are committed to providing you with the best products and support. If you have any questions about the installation process or are interested in purchasing our switches, we encourage you to reach out to us for a detailed discussion. Our team of experts is ready to assist you in finding the right solutions for your electrical needs.
References
- Electrical Installation Guidebooks
- Manufacturer's Instructions for 2 Way Pull Cord Switches


